MINIDLNA is a Universal Plug and Play Media (UPnP) DLNA Streaming Server which can be used to stream locally stored video to DLNA equipped TVs and well as to other PCs using software like XBMC (now called KODI) and VideoLAN (VLC).
Whilst there are other programs out their like MediaTomb that do a similar thing, MiniDLNA is more lightweight and provides better support for media formats.
To install, from Terminal enter
sudo apt-get install minidlna
Once installed you will need to edit the configuration file
sudo nano etc/minidlna.conf
Go to the section below and under the line ‘media_dir=/var/lib/minidlna’ add the path to your media.
# Path to the directory you want scanned for media files.
#
# This option can be specified more than once if you want multiple directories
# scanned.
#
# If you want to restrict a media_dir to a specific content type, you can
# prepend the directory name with a letter representing the type (A, P or V),
# followed by a comma, as so:
# * "A" for audio (eg. media_dir=A,/var/lib/minidlna/music)
# * "P" for pictures (eg. media_dir=P,/var/lib/minidlna/pictures)
# * "V" for video (eg. media_dir=V,/var/lib/minidlna/videos)
# * "PV" for pictures and video (eg. media_dir=PV,/var/lib/minidlna/digital_camera)
media_dir=/var/lib/minidlna
On my media server the path I added looked like the following to include two locations for my video files:
media_dir=V,/media/Data/Videos
media_dir=V,/Videos
Now set friendly name entry for the media server
friendly_name=MediaServer
and enable Automatic Discovery of new media
# Automatic discovery of new files in the media_dir directory.
inotify=yes
The rest of the settings can remain unchanged
Now restart MiniDLNA
sudo minidland –R
and reload the database
sudo service minidlna force-reload
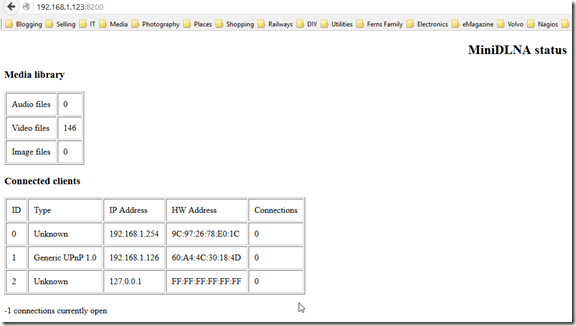
If you want to display the limited web interface status for MiniDLNA, open a web browser enter the servers ip address on port 8200
e.g. 192.168.1.123:8200
You will see something similar to the screen below:
For additional help in configuring MiniDLNA see the Ubuntu Wiki.
[Note: The default location of the MiniDLNA database (files.db) is in /lib/cache/minidlna, the manpages documentation is incorrect]
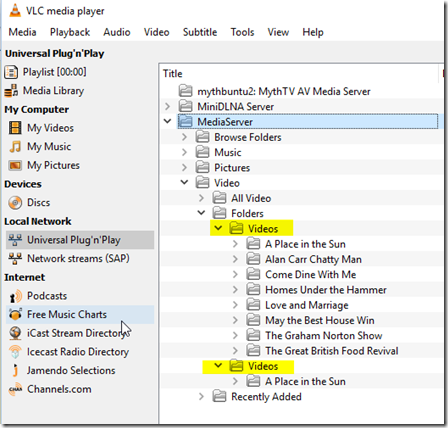
To test that MiniDLNA is working, launch VLC and select View > Playlist
Expand out under Local Network Universal Plug ‘n’ Play and find your MiniDLNA server by the friendly name given earlier. The following content will be displayed.
If you wish you can play the content from within VLC by clicking on one of the videos!


etc/minidlna.conf not there
Probably way too late, but try this instead:
sudo nano /etc/minidlna.conf
Reblogged this on scuba323 and commented:
/etc/minidlna.conf
😉
Other than that, great article!
Your command to restart the server has a typo, and I had to use “sudo service minidlna restart” instead.
Thank you, I can now rid myself of plex
sudo nano /etc/minidlna.conf
sudo minidlnad -r
sudo service minidlna force-reload
Simple and straight to the point. Thank you!