The appeal of having a Network Attached Storage “box” on the network is great if you wish to have a central place to store your data. However, NAS boxes are expensive starting around £100 and going up to £600 for a Drobo and that’s before you add the hard disks.
If you are like me, you probably have a PC sitting in the corner looking for a new use, and wouldn’t it be great to turn it into a NAS server, and a FTP server and download bittorrets with it….. Well your can, and using FreeNAS you can have it all for free!
In my case this is a Pentium III 800MHz Compaq Deskpro EN tower, maxed out with 512Mb of RAM and a Promise PCI SATA/ IDE card to manage large 250Gb+ hard disks. For FreeNAS this is quite a high spec PC as it can run with 256Mb RAM and a Pentium II CPU!
FreeNAS is an open source Linux distribution based on FreeBSD http://en.wikipedia.org/wiki/FreeNAS. It works as a preconfigured "software appliance". Like any appliance, it needs to be set-up and this is mainly done through a very user friendly web interface.
The following instructions will walk you through installing FreeNAS.
FreeNAS can be downloaded from http://freenas.org/downloads.
Installing FreeNAS Server
Boot off the FreeNAS CD, you will get a boot menu with a countdown timer, allow the PC to boot with the default boot option.
Once booted you will get a menu similar to that below
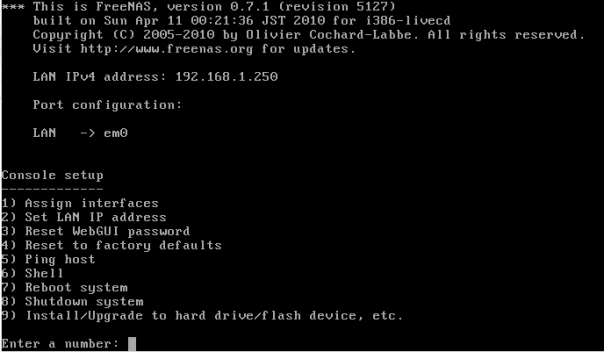
Select option 9) Install/ Upgrade to hard drive/ flash device, etc.
You will be presented with a number of options as FreeNAS can be installed on a variety of different types of media including USB memory sticks.

We are going to choose option 3 ‘full’ OS install to HDD (Hard Disk Drive), the following will be displayed.

Press enter to confirm.
You will then be asked to select the CD ROM drive the FreeNAS CD is in. Select the drive and press enter.
You will now be asked to select the hard disk on to which to install FreeNAS. Again select the drive and press enter.
The FreeNAS installer will ask you to set the size of the FreeNAS partition
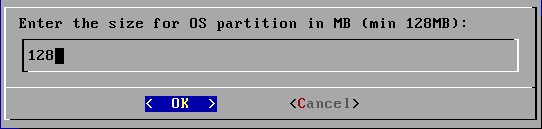
Select the default (128Mb) and press enter.
On being asked about whether you would like a swap partition, select No.
The FreeNAS CD ROM will now be mounted and FreeNAS installed.
Once the installation has completed, you will get a message similar to the following

When you press enter, you will be returned to the Console Set-up menu.
Configuring the Network Interface
Select option 2 Set LAN IP address
You will be asked the following

You now have two options:
Option 1 (If you select Yes): DHCP allocated IP Address
The advantage of DHCP is that you don’t have to worry about configuring the IP address, this is by far the lest technical way of setting up the server and works well if you don’t plan to turn it off.
If you select this option, you will then be asked if you wish to configure the network interface for IPv6. For most people, the answer will be No (default). Press enter, after a few seconds you will get a something similar to the following:

This tells us that the FreeNAS server has an IP Address of 192.168.1.66 and the web interface can be accessed by entering http://192.168.1.66:80 in a web browser. The :80 means that the website will be accessed on port 80.
Pressing Enter returns yo to the main menu.
Option 2 (If you select No): Fixed IP Address
If you answer No, you will be asked to enter your own IP address. Make sure that the first three sets of numbers correspond to your network address range. To check open terminal and enter ifconfig. You should see something similar to the following

Enter the first three sets of numbers which make up the inet addr e.g 192.168.1 and then enter the final number which must be available to use. If uncertain, from terminal enter ping followed by the full IP address you wish to use. If you get the Message “Destination Host Unreachable” then it is unlikely that that IP address is being used. Press CTRL+C to terminate the ping.
Enter the fixed IP address you wish to use.
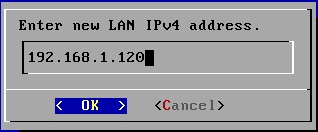
Select OK and press enter.
You will now be asked to enter the subnet mask using CIDR (Classless Inter Domain Routing) http://en.wikipedia.org/wiki/Classless_Inter-Domain_Routing notation
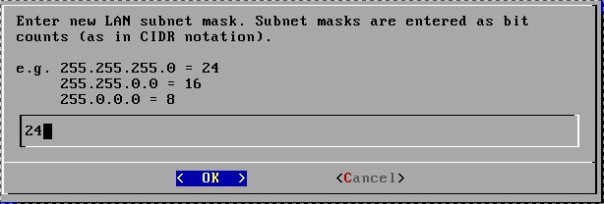
The easiest way to work out this two digit number from your subnet mask which in our example we got 255.255.255.0 from doing an ifconfig (see above) is to use a online calculator. I use http://grox.net/utils/whatmask/ which is simple to use.
Enter the IP address, and press Go, you will get something similar to the following

In this example the CIDR number is 24. Enter it and select OK.
You will now be asked to enter your default Gateway, this is normally 254, so in this example you would enter 192.168.1.254.
You will next be asked for a DNS IP address. Unless you are running your own DNS server, leave this black and select OK. Other wise enter your DNS server IP address.
You will then be asked if you wish to configure the network interface for IPv6. For most people, the answer will be No (default). Press enter, after a few seconds you will get a something similar to the following

This tells us that the FreeNAS server has an IP Address of 192.168.1.120 and the web interface can be accessed by entering http://192.168.1.120:80 in a web browser. The :80 means that the website is being accessed on port 80.
Pressing Enter returns you to the main menu. You are now ready to login
Logging in to you FreeNAS Server
On a network attached PC, open a web browser and enter the ip address 192.168.1.120:80.
The following login screen will be displayed
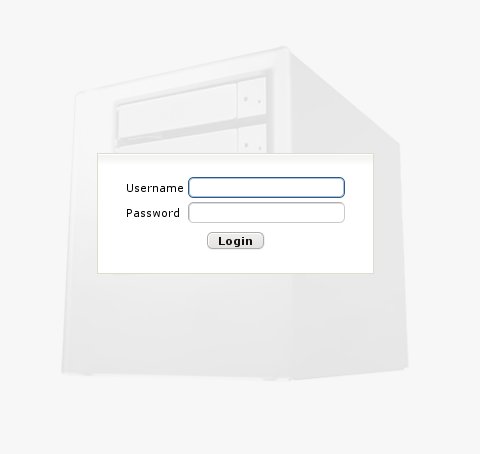
Enter the following login credentials:
Username: admin
Password: freenas
The FreeNAS home page of you server will now be displayed

You have successfully installed your FreeNAS server.
In Part 2, I’ll be looking at configuring FreeNAS and mounting your storage so it is accessible from other computers.
